¶ OpenWrt One
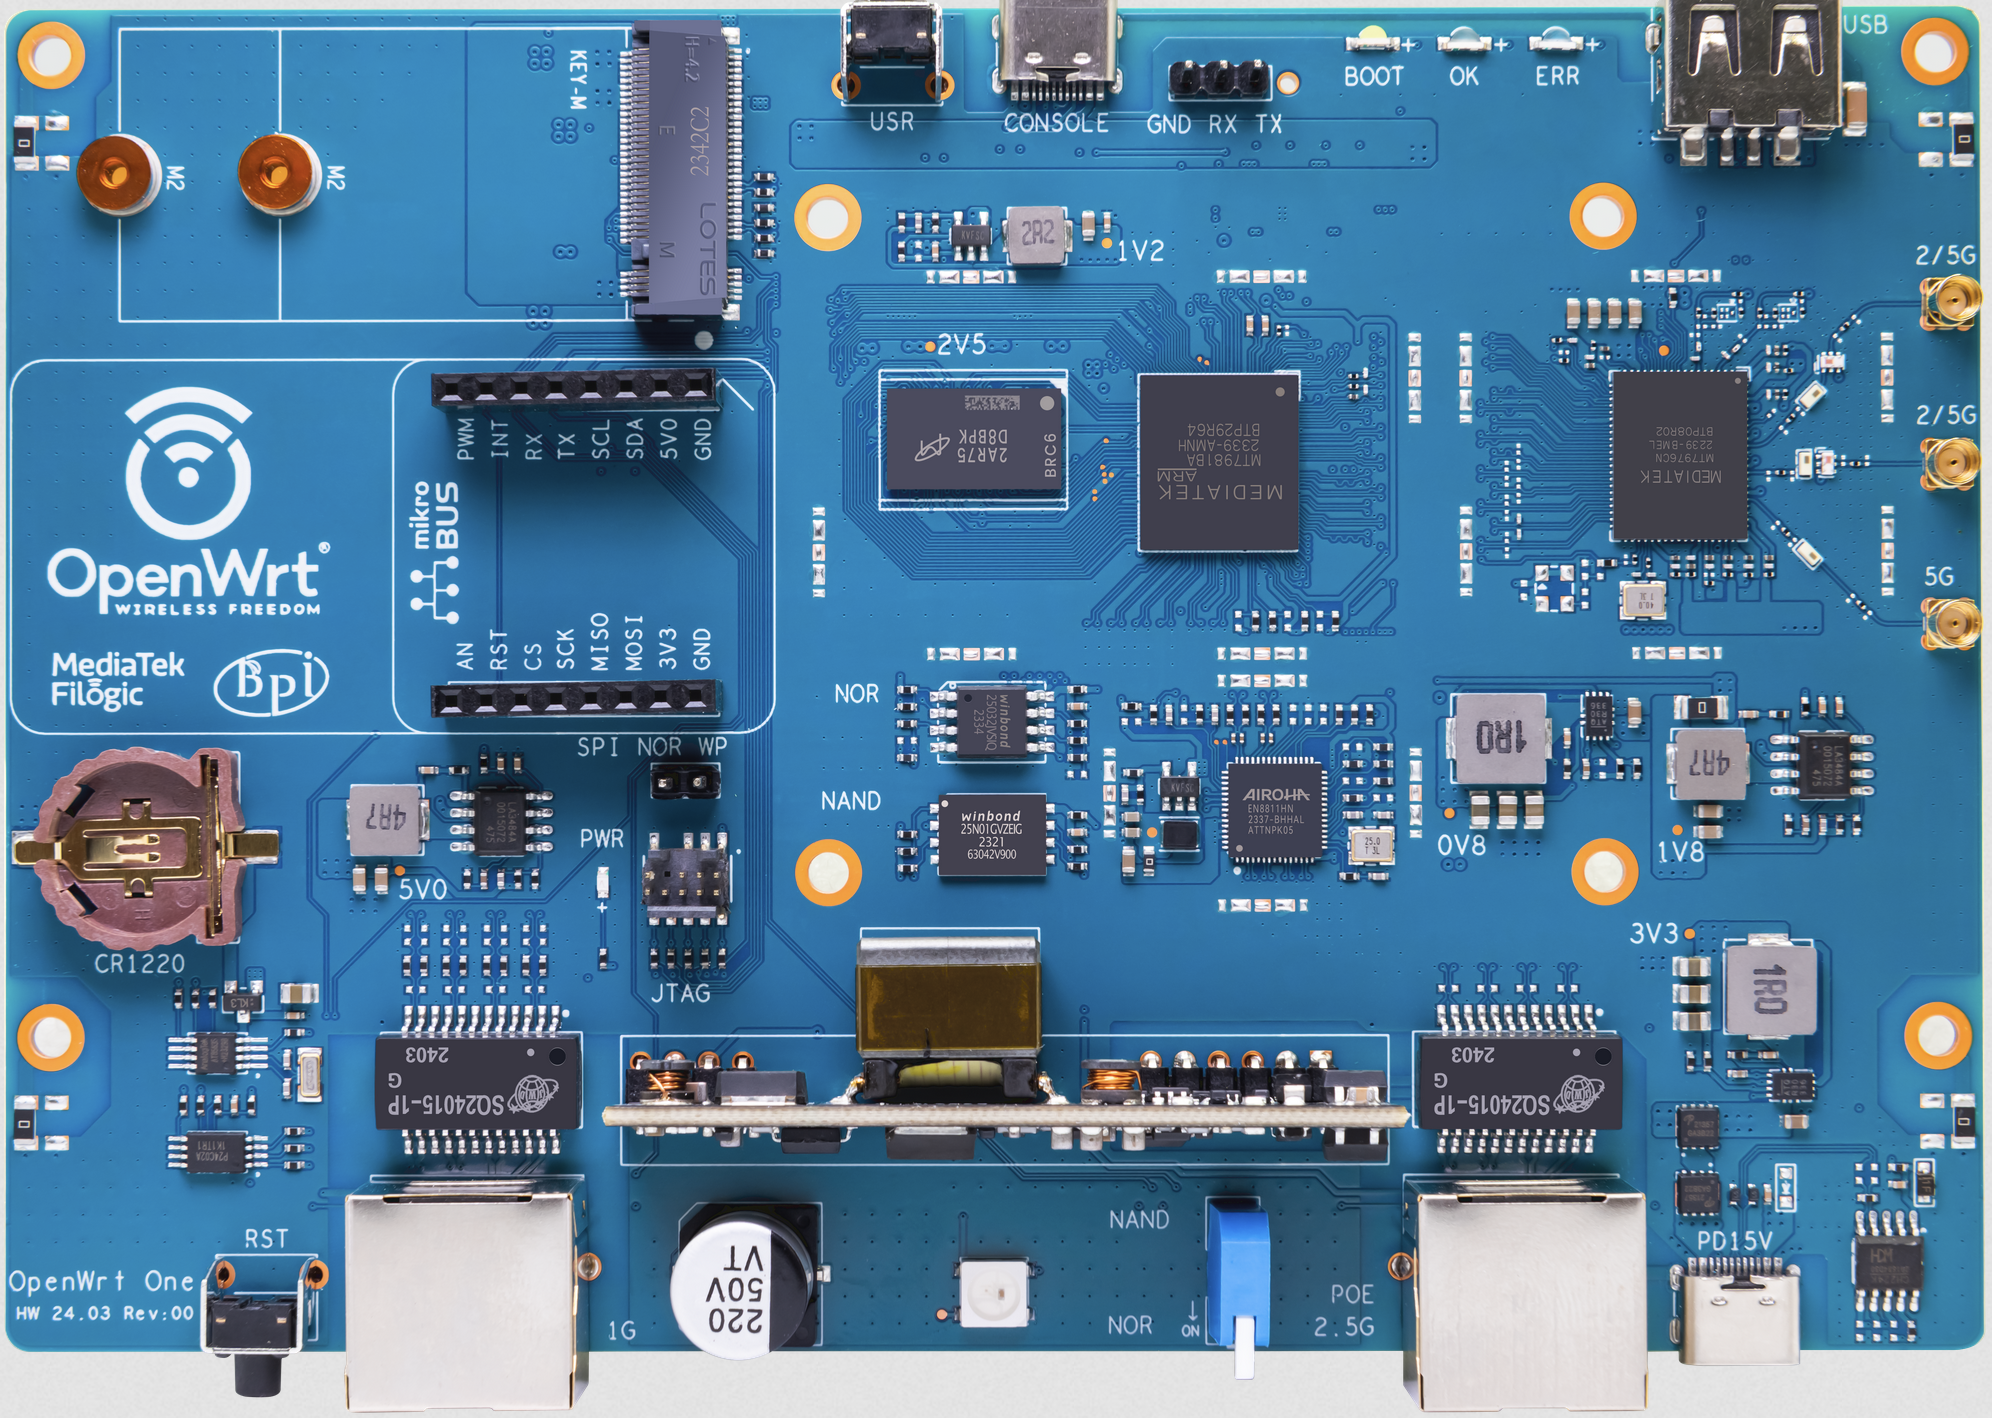
OpenWrt One is based on the MediaTek Filogic 820 SoC and has WiFi 6, dual-band, 3x3/2x2, 1x 2.5Gbit WAN, 1x 1Gbit LAN, 1GB DDR4 RAM, 256 MiB NAND, 16 MiB NOR (for recovery), M.2 SSD, USB-C Serial console and USB 2.0. Power Over Ethernet (POE): an IEEE 802.3af/at compliant device can power the device via the RJ-45 2.5 Gbps WAN connector.
¶ Supported Versions
<!-- ToH: {
"source": "json",
"dom": "t",
"paging": false,
"rotate": true,

"shownColumns": ["brand", "model", "supportedcurrentrel", "oemdevicehomepageurl", "fccid", "forumsearch", "deviceid"],
"filterColumns": {"brand": "^OpenWrt$", "model": "^One$"}
} -->
¶ Hardware Highlights
<!-- ToH: {
"source": "json",
"dom": "t",
"paging": false,
"rotate": true,
"shownColumns": ["model", "cpu", "cpumhz", "cpucores", "flashmb", "rammb", "wlanhardware", "ethernet1gports", "ethernet2_5gports", "usbports", "detachableantennas", "ledcount", "buttoncount", "jtag", "powersupply"],
"filterColumns": {"brand": "^OpenWrt$", "model": "^One$"}
} -->
Note that recent (2025-10) batches of the OpenWrt One have an M.2 slot with a detached post at the 2230 position and the shipped product contains no way to attach the post.
Schematics and datasheets for the OpenWrt One can be found at https://one.openwrt.org/hardware/
The OpenWrt One HowTo can be found at https://one.openwrt.org/hardware/OpenWrtOne-HowTo.pdf
¶ Installation
<!-- ToH: {
"source": "json",
"dom": "t",
"paging": false,
"rotate": true,
"shownColumns": ["model", "version", "supportedcurrentrel", "firmwareopenwrtinstallurl", "firmwareopenwrtupgradeurl", "firmwareoemstockurl"],
"filterColumns": {"brand": "^OpenWrt$", "model": "^One$"}
} -->
¶ What to Expect When You First Power Up Your OpenWrt One
Each Openwrt One comes flashed with the most current OpenWrt Release Firmware available based on the current manufacturing batch date. LuCI GUI will be installed, and the device is ready to run Out Of the Box using standard default settings.
- before powering up the device make sure the NAND/NOR switch is set to NAND
- connect to the 1G port of the device via Ethernet through 192.168.1.1
- power on the device and wait for the green led to go solid indicating the device has booted.
- point your browser to 192.168.1.1 to use the LuCI GUI or from a terminal session via
ssh root@192.168.1.1
Note: If you upgrade to the SNAPSHOT Branch from the original OOB factory default, the LuCI GUI will not be installed by default.
Follow the Quick Start Guide to configure the unit for your use.
¶ Upgrading the Firmware
¶ Upgrading the firmware from USB
- prepare a FAT32 formatted USB drive that contains a file named
openwrt-mediatek-filogic-openwrt_one-squashfs-sysupgrade.itb-- renamed from the fully versioned file from either the SNAPSHOT or Release repositories - remove power
- insert the USB stick in the Type A USB Port.
- make sure NAND boot switch is selected.
- press and hold the button on the back side labeled Reset
- power up the device. Release the Reset button as soon as all LEDS turn off.
- wait for the middle LED to go green.
The device will boot from NAND and the bootloader will reflash the kernel and root filesystem on the NAND.
Note: You may have to try other USB drives formatted to FAT32. There are observations that some USB drives have incompatibility issues. Try using a MBR partition table. If you get a Bad device specification usb 0 error from u-boot, increasing the delay may help:
| U-Boot Shell |
|---|
|
OpenWrt One> setenv usb_pgood_delay 4000
OpenWrt One> usb reset
resetting USB...
scanning usb for storage devices... 1 Storage Device(s) found
|
Note: Early OpenWrt One's (which shipped with a SNAPSHOT from before the 24.10.0 release) had an issue Green LED doesn't turn on at end of OpenWrt One USB-based sysupgrade. The upgrade still succeeds in this case. This anomaly was resolved with https://github.com/openwrt/openwrt/commit/5ef71eaafd4e128ec3708a66b5633214427da373
¶ Upgrading using other options (ASU, Owut, Generic Sysupgrade, or Firmware Selector)
Follow the relevent wiki articles:
- https://openwrt.org/docs/guide-user/installation/sysupgrade.owut
- https://openwrt.org/docs/guide-user/installation/attended.sysupgrade?s[]=asu#upgrade_using_attended_sysupgrade
- https://openwrt.org/docs/guide-user/installation/generic.sysupgrade
- https://firmware-selector.openwrt.org select/customize your firmware Release version or current SNAPSHOT and select REQUEST BUILD
¶ Upgrading from Booting the initramfs NAND Recovery Mode
This is similar to the Upgrading the firmware from USB but differs such that the front button is held instead (and no USB stick is needed to be prepared).
- remove power
- make sure NAND boot is selected
- press and hold the button on the Front panel.
- power up the device. Release the Front panel button as soon as all Front Panel LEDS turn off.
- wait for the middle LED to go green.
The device will boot a recovery initramfs image. You can use any of the Upgrading using other options detailed above.
¶ Recovery
For installation the factory.ubi, sysupgrade and raw kernel image are offered. In addition, the uboot bl31-uboot.fip FIP [1], factory.bin and preloader.bin are offered in NAND and (stripped down recovery) NOR variants for flashing the respective memories for recovery purposes (see relevant section).
¶ Boot into NOR/full recovery mode: Flash NAND from USB
For when the unit does not boot from NAND anymore, there is a failsafe recovery method to boot from NOR. This can be used even if the TF-A [2] or bootloader on the NAND are broken. The process is similar to the the NAND recovery boot, except for the NAND/NOR switch being on NOR (and the USB flash drive needing to be prepared):
- prepare a FAT32 formatted USB drive that contains the NAND preloader and the factory image from the SNAPSHOT or Current Stable Release Download Pages:
- openwrt-mediatek-filogic-openwrt_one-snand-preloader.bin
- openwrt-mediatek-filogic-openwrt_one-factory.ubi
- remove power
- insert the USB drive
- make sure NOR boot is selected
- press and hold the button on the front side
- power up the device. Release the Front panel button as soon as all Front Panel LEDS turn off.
- wait for the LED to go green
The NOR recovery system will then factory re-flash the entire NAND memory.
¶ Boot into UART recovery: Flash NOR from TFTP
The NOR recovery memory can be re-flashed, too. This is a two step process:
- UART boot: Copy DDR4 initialization and NOR bootloader images to RAM over the UART/serial console connection using mtk_uartboot, and boot from RAM.
- NOR flash: Then use the boot menu recovery to re-flash images to NOR from a TFTP server.
For the second step, the SPI NOR WP jumper must be in place (factory default position) and a TFTP server must be running and connected to the One's LAN port, to serve the new images.
¶ Preparation
¶ Preparation for step 1 - UART flashing
To copy image over UART, the mtk_uartboot binary needs used. It can be downloaded from the assets section of the latest Releases. Select the appropriate archive for your operating system and unpack the mtk_uartboot binary.
On macOS, you may need to remove the quarantine attribute using xattr -d com.apple.quarantine mtk_uartboot.
Also download the DDR4 initialization file and NOR BL31/uboot image for later transfer & boot via UART from the SNAPSHOT or Current Stable Release Download Pages in subdirectory <release-version>/targets/mediatek/filogic:
- mt7981-ram-ddr4-bl2.bin
- openwrt-mediatek-filogic-openwrt_one-nor-bl31-uboot.fip
NOTE: On the page, you will see only partial file name for the second file -
openwrt_one-nor-bl31-uboot.fip
¶ Preparation for step 2 - TFTP flashing
Connect an ethernet cable to the computer and to the 1G LAN port of the router. On the computer, set the ethernet interface to manual settings as following:
IP: 192.168.11.23
Mask: 255.255.255.0
Gateway: 192.168.11.11
Prepare a TFTP server to listen on 192.168.11.23 (the OpenWRT One will use an IP of 192.168.11.11). Download the following files from the SNAPSHOT or Current Stable Release Download Pages in subdirectory <release-version>/targets/mediatek/filogic to be served by the TFTP server (images of BL31/uboot, the preloader, and the recovery image):
- openwrt-mediatek-filogic-openwrt_one-nor-bl31-uboot.fip
- openwrt-mediatek-filogic-openwrt_one-nor-preloader.bin
- openwrt-mediatek-filogic-openwrt_one-initramfs.itb
NOTE 1: On the page, you will see only partial file names, e.g.
openwrt_one-nor-bl31-uboot.fipforopenwrt-mediatek-filogic-openwrt_one-nor-bl31-uboot.fip
NOTE 2: The files downloaded will have the release version in their name. You need to remove it since the router asks for a file without version. E.g.
openwrt-25.12.2-mediatek-filogic-openwrt_one-nor-bl31-uboot.fip->openwrt-mediatek-filogic-openwrt_one-nor-bl31-uboot.fip
¶ UART boot
The following command can be used to use the downloaded mtk_uartboot to copy the boot files and open a serial console connection using GNU Screen directly thereafter, s.t., the boot menu recovery can be accessed. From there, the flashing over TFTP can be initiated. With the router still powered off run on your computer whilst connected through USB-C:
path/to/mtk_uartboot --aarch64 \
                     --brom-load-baudrate 115200 \
                     --bl2-load-baudrate 115200 \
                     -s /dev/ttyACM0 \
                     -p path/to/mt7981-ram-ddr4-bl2.bin \
                     -f path/to/openwrt-mediatek-filogic-openwrt_one-nor-bl31-uboot.fip \
    && screen /dev/ttyACM0 115200
Note: Replace the path/to with the correct paths to the downloaded files and /dev/ttyACM0 with the serial console device of the connection on your host system.
You will need to elevate permissions to gain access to dialout Group for serial devices like /dev/ttyS* and /dev/ttyUSB* and uucp Group for UUCP-related tasks. Add your_username to both the dialout and uucp Groups to your linux host like this:
sudo usermod -aG dialout your_username
sudo usermod -aG uucp your_username
Remember to log out and back in to update your permissions.
With mtk_uarboot starting you will see the following output:
mtk_uartboot - 0.1.1
Using serial port: /dev/ttyACM0
Handshake...
Now power on the router and mtk_uartboot will continue with hw code: 0x7981 and further logs as it uploads the BL2 and FIP (Firmware Image Package). After the upload succeeded, GNU Screen should start up and you should see the boot menu.
¶ NOR update from TFTP Server
Make sure to interrupt the boot process by pressing down arrow when the boot menu appears. Within the boot menu, choose 7. Lock NOR. (Remove jumper afterwards).
Note: Successful NOR flashing is slower than when the flashing isn't actually happening.
Once the firmware has been re-flashed the router can be rebooted (and the jumper removed).
¶ Acquiring Console/Serial Access (Built In)
The OpenWrt One has a built-in USB-C serial console port on the front panel (next to the USB-A host port), which uses an integrated USB-to-serial converter. This typically appears as a virtual COM port on your PC without needing extra drivers.
Console or Serial access to the OpenWrt One is a necessary process to ensure the maintenance, recovery, and restoration of the firmware environment. These are the general steps to connect to a console session and confirm serial communication with the OpenWrt One device.
¶ Securing TTY and serial console access
To enable password prompt for TTY and serial console access see: openwrt_security#securing_tty_and_serial_console
¶ Prerequisites
 * A USB-C to USB-A or USB-C cable (depending on your PC's ports). Do not use a USB-C charge/sync cable - you need a USB-C data cable to effect serial access.
 * A terminal emulator program on your PC host such as **Putty** on a  Windows host or **Screen** on a Linux host.
 * Ensure the NAND/NOR Switch is set for the specific environment you want to work in.
¶ Steps
* Connect the cable: Plug one end of the USB cable into your Windows or Linux PC and the other into the USB-C serial console port on the front of the OpenWrt One. This port is specifically for serial access, not power.
¶ Windows
* Open **Device Manager** and expand the **Ports (COM & LPT)** section. Look for a new entry like **USB Serial Device (COMX)** or something labeled **OpenWrt One** (the exact name may vary, but it should appear after connecting). Note the COM port number (e.g. COM3 or COM5).
¶ Linux
* Invoke a Terminal session and issue ''ls /dev/tty*''. Peruse the listing for (typically) ''ttyACM0'' or ''ttyUSBx''. You can confirm by disconnecting the cable end from the OpenWrt One and re-invoking the ''ls /dev/tty*'' to confirm the expected virtual port is no longer displayed in the listing.
¶ macOS
 * Confirm the dialog about enabling a connected USB device
 * Invoke a Terminal session and issue ''ls /dev/tty*''. Peruse the listing for (typically) ''tty.usbmodem00001'' or ''ttyUSBx''. You can confirm by disconnecting the cable end from the OpenWrt One and re-invoking the ''ls /dev/tty*'' to confirm the expected virtual port is no longer displayed in the listing.
¶ Open a terminal emulator(Windows) or a Terminal session (Linux)
¶ Windows
- Launch PuTTY and select Serial as the connection type.
- Enter the COM port as determined above (e.g., COM3) in the Serial line field.
- Set the baud rate to 115200 and set default settings 8 data bits, 1 stop bit, no parity (8N1), no flow control, and select Open to connect to and establish serial contact to the OpenWrt One.
- Press the Reset Button on the device backplane. The OpenWrt One will reset and you should see the OpenWrt Boot Sequence output from the OpenWrt One. To interrupt the Normal Boot Sequence press the space key to access the requisite NAND or NOR Boot Menu.
¶ Linux and macOS
- Open a Terminal session on your host PC.
- Invoke
screen /dev/ttyACM0 115200 - Press the Reset Button on the device backplane. The OpenWrt One will reset and you should see the OpenWrt Boot Sequence output from the OpenWrt One. To interrupt the Normal Boot Sequence press the space key to access the requisite NAND or NOR Boot Menu.
¶ Enclosure
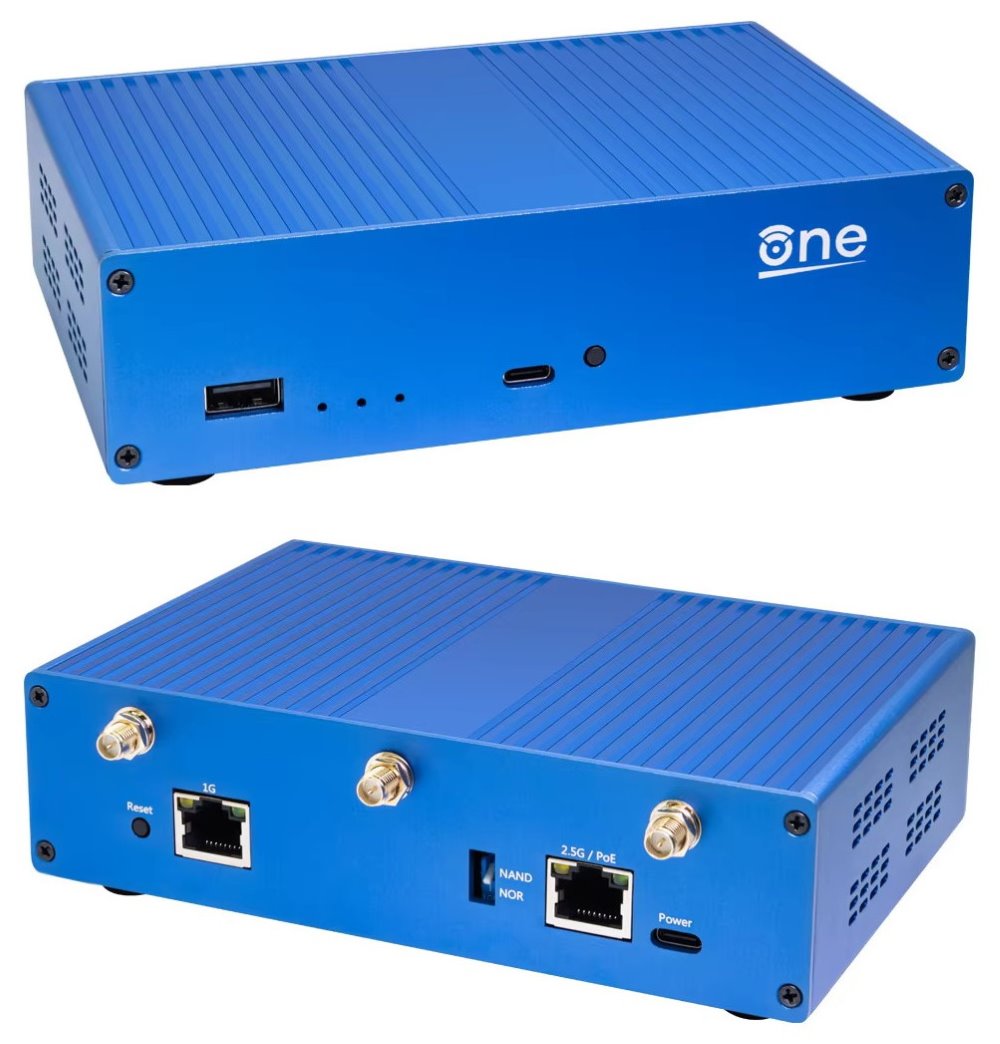
Dimensions: 148 x 100.5 mm - compatible with Banana Pi BPI-R4 case design.
¶ Notes
- See BananaPi OpenWrt One page for additional information.
- NOR is used for recovery. In normal operations the router should be booted from NAND.
- OpenWrt One official distributors on SFC:
¶ Tags
[[meta:tags|How to add tags 